
The drive home in our 2003 VW Jetta Smyth Ute donor was a good shakedown, and a chance to get to know the car. Keeping the windshield clear without the blower was challenging at times, and changing lanes was tricky with two broken outside mirrors. But that drive proved to me that we chose the right car. The ride was the perfect German compromise between performance and comfort. Brakes are okay, and just fine for the street. I’d want to make some improvements for the track, but we didn’t get this to be a track car. We wanted a good, cheap, solid runner that runs and drives well and only needs a little work to be roadworthy before the Ute conversion. That’s exactly what we got.
And that motor… Volkswagen was ahead of its time with the idea of turbocharging a smaller motor to get good fuel economy, but the same performance as a bigger motor. Everyone seems to be doing it these days, but Volkswagen was among the first “regular cars” to turbocharge. (Saab did it even earlier with the 900 Turbo of the 1980s.) The 1.8T under the hood of our Jetta makes 180hp and 173 lb/ft of torque. The top-of-the-line 24-valve VR6 motor beats it with 200hp and 195 lb/ft of torque, but not by much. A simple tune would put the 1.8T ahead of those numbers with no other modifications. Plus the fact that the 1.8T weighs just 282lbs dry, as opposed to 375lbs for the VR6 – most of which hangs ahead of the front wheels – makes the turbo four banger the better choice for handling, as well as fuel economy. And that torque! The small K03 turbo spools up quickly and delivers boost at low revs, helping torque even more than horsepower. At just 1700 RPM, the Jetta makes more torque than my Subaru BRZ, ever. I would’ve certainly taken either engine in a car this cheap with no complaints whatsoever. An intake would be required for a VR6, because it makes the best intake growl I’ve ever heard. But the 1.8T was my top choice, and we got it. It’s also my first turbo car, which is fun.
After clearing some existing misfire trouble codes, the engine has been running more smoothly the more I’ve run it. I’m thinking it may just need an “Italian tune-up” after sitting for who knows how long. I’ll do that once we get the car registered and insured so I can start commuting in it (the plates on it right now are left over from the Comanche – and no, I’m not driving on the street with them). The combination of highway and city driving on my daily commute is a good test for any car.

I also replaced a few burnt out light bulbs. Annoyingly, most of them – reverse, brake, license plate, third brake light – were on the back of the car. This meant I had to fix them all now to pass state inspection, only to replace them with the Ute kit’s tail lights in a few months anyway. Fortunately, bulbs are cheap, and the same two-pack fixed both the reverse and brake lights. But my main concern was the third brake light, a proprietary LED unit integrated into the Wolfsburg Edition’s rear wing. I didn’t want to buy a new factory part for a temporary fix that I’ll just remove in a few months. I looked into buying a generic red LED strip to stick on the trunk lid temporarily, then swap to my motorcycle as an additional brake light later.
Fortunately, the light itself wasn’t the problem – the wiring had broken inside the trunk lid, and when I connected the light’s wires to my 12v power supply it lit up perfectly, without a single dead LED. I kludged some of my own wiring together, ran it through a rubber grommet under the center wing support, and used a partly unbent paper clip to hook and pull it through to the inside of the trunk. Then I spliced it into the factory wiring, and as Captain Picard would say, “There are three lights!!!” I’d do a better wiring job for a permanent installation, but this isn’t, so I won’t. In fact, I’m actually considering installing the Jetta’s third brake light on my motorcycle trunk once the Jetta’s trunk lid comes off for the Ute conversion, the opposite of my original idea.
Not all of the lighting issues were in the back. The passenger side repeater turn signal was out. I ordered some LED bulbs to replace both sides, since I’d read that the common 194 bulbs most people used were too powerful and burned out the sockets. After popping the light out of the fender, I saw that the light wasn’t burned out, but literally out. The wiring harness had simply popped out of the housing, and the bulb itself still worked. I figured I’d swap to the LEDs anyway since I had them, only for the LED bulb to get stuck partway in and partway out of the housing. I couldn’t plug the wiring harness in properly, and my attempts to remove the LED bulb destroyed it. So I put the stock bulb back in, put it back together, and called it good enough. I never had this problem upgrading to LEDs on my BRZ, but I’ll be sure to avoid these particular 194 LEDs if I ever upgrade its sidemarkers.

I’m not sure if foggy headlights are a reason to fail inspection, but they’re certainly not good. I fixed them up with an inexpensive but effective Turtle Wax Headlight Restorer Kit, which I already wrote a separate review on.
Finally, both side mirrors had to be replaced. Both had cracked glass, and one had duct tape where a plastic cap should be. I was surprised at how easy it was to find affordable replacements – about $37 each for the left and right side on Amazon with free two-day shipping on Prime (gotta watch The Grand Tour anyway, right?) These power heated mirrors by TYC are only slightly more expensive than the manual ones.
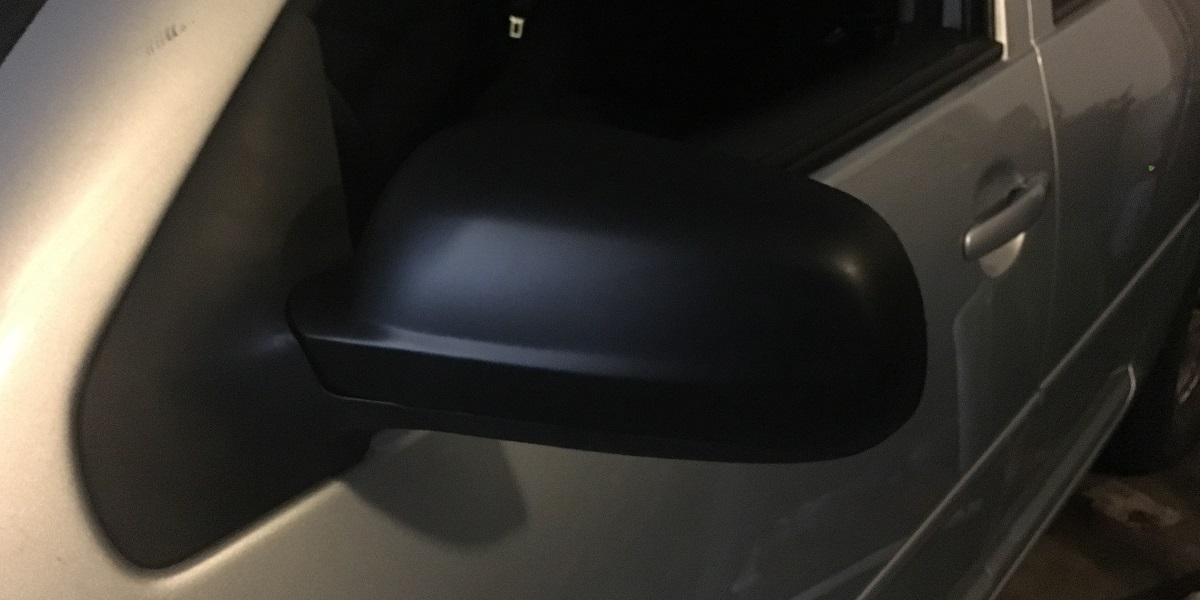
Installation was simple, especially after watching a couple of YouTube videos. The inner door panel has to come off, but not completely. It can hang as you remove the tweeter speaker from the front corner of the door where the mirror bolts in. Remove that and some foam padding, unplug the wiring harness, and remove the single Torx bolt that holds it on. The mirror comes right off. It’s easiest if you roll down the window before you begin so that you can reach through it to hold the mirror while you remove the bolt. The aftermarket parts go on exactly the same way the factory parts come off. They’re black, rather than silver to match the car, but that’s OK. Black matches everything, and after the Ute conversion the whole thing will get painted anyway. The important thing right now is that they work and are all one piece. Speaking of silver, I also covered the big crack in the back bumper plastic with duct tape, because duct tape fixes everything. It also eliminates any sharp edges in the cracked plastic that might fail inspection.
And with that, it’s time to put this beast on the road. But the restoration part of the project isn’t done. I’ve fixed the issues that I know wouldn’t pass state inspection, but it ain’t over till it’s over, so who knows what they could bounce me for. I also have other issues I’m working on that don’t affect the car’s legality, but certainly affect its operation and reliability. More on that next time.


1 comment
Comments are closed.